
A proper asphalt shingle roof installation follows seven critical stages that protect your home for the next 20 to 30 years. Cutting corners on any single step can void manufacturer warranties, accelerate wear, and lead to leaks that cost thousands to repair. Whether you are replacing a storm damaged roof in Rehoboth Beach and surrounding areas or planning a proactive upgrade, understanding the process helps you hire the right contractor.
- Step by step process: A clear walkthrough of the seven stages every quality install must include.
- Materials and timeline: Real numbers on cost ranges, square footage estimates, and how long each phase takes.
- Common mistakes to avoid: Installation errors that shorten roof life and how a GAF Master Elite contractor prevents them.
What Is Asphalt Shingle Roof Installation?
Asphalt shingle roof installation is the multi step process of removing an old roof, preparing the deck, and applying a new layered system of underlayment, shingles, and accessories. The full job typically takes 1 to 3 days for an average home and costs between $7,000 and $15,000 in Delaware depending on roof size and shingle grade.
Why Does Proper Installation Matter So Much?
Proper installation determines whether your roof lasts 15 years or 30, even when the same shingles are used. Industry data shows roughly 40% of new roofs contain at least one installation defect that shortens lifespan, which is why hiring a certified contractor is the single most important decision in the process. Quality installation also preserves manufacturer warranties, which can be voided when nailing patterns, ventilation, or flashing details deviate from spec. In coastal Delaware, where wind uplift and salt air put extra stress on roofing systems, installation precision matters even more.
- Warranty protection: Manufacturer warranties often require certified installation to remain valid.
- Wind resistance: Correct nail placement is the difference between shingles rated for 110 mph winds and shingles that fail at 60 mph.
- Lifespan extension: Roofs installed to ASTM and manufacturer standards consistently reach the upper end of their service life.
- Resale value: Home inspectors flag visible installation flaws, reducing offer prices by thousands.
What Types of Asphalt Shingles Are Available?
Three main types of asphalt shingles dominate the residential market: 3 tab, architectural, and luxury. Each tier offers a different balance of cost, lifespan, and wind resistance, and choosing the right grade for coastal Delaware exposure has a direct impact on how long your roof lasts.
What Are 3 Tab Shingles?
3 tab shingles are the most basic and affordable asphalt option, recognizable by their flat single layer profile and uniform rectangular tabs. They typically cost $1.50 to $2.50 per square foot installed and last 15 to 20 years under normal conditions. Their thinner build makes them more vulnerable to wind uplift, with most products rated to only 60 to 70 mph, which is below the threshold many coastal Delaware homes need. Manufacturers still produce them as a budget option, but most quality contractors recommend stepping up at least one tier for any home in Rehoboth Beach and surrounding areas where storm exposure is a real concern.
- Cost range: Roughly $1.50 to $2.50 per square foot installed, the lowest cost option.
- Wind rating: Typically rated for 60 to 70 mph, lower than coastal exposure often demands.
- Lifespan: 15 to 20 years in real world conditions, less in harsh climates.
- Best use: Rental properties, sheds, and short term ownership scenarios.
What Are Architectural Shingles?
Architectural shingles, also called dimensional or laminate shingles, are the most popular choice on American homes today and the standard recommendation for most Delaware installs. Their multi layer construction creates a textured, shadowed appearance that mimics wood shake or slate, and the added thickness improves durability across the board. Pricing typically runs $2.50 to $4.50 per square foot installed, with lifespans of 25 to 30 years and wind ratings up to 130 mph on premium lines. Brands like GAF Timberline HDZ and CertainTeed Landmark dominate this category and carry strong manufacturer warranties when installed by certified contractors.
- Cost range: $2.50 to $4.50 per square foot installed, the best value tier.
- Wind rating: Up to 130 mph on premium architectural lines.
- Lifespan: 25 to 30 years with proper installation and ventilation.
- Best use: Primary residences and long term ownership in mixed climates.
What Are Luxury or Designer Shingles?
Luxury shingles are the premium asphalt tier, engineered to replicate the look of natural slate or hand split cedar shake at a fraction of the weight and cost. They run $4.50 to $7.00 per square foot installed and carry lifespans of 30 to 50 years on top tier products. Wind ratings often reach 150 mph, and most lines come standard with Class 4 impact resistance under UL 2218 testing, which can qualify homeowners for insurance discounts. GAF Grand Sequoia, CertainTeed Presidential, and Owens Corning Berkshire are common luxury options chosen for high end coastal homes.
- Cost range: $4.50 to $7.00 per square foot installed, the premium tier.
- Wind rating: Up to 150 mph with Class 4 impact resistance on most lines.
- Lifespan: 30 to 50 years with proper care and ventilation.
- Best use: Custom homes, historic properties, and long term coastal investments.
7 Step Asphalt Shingle Roof Installation Process
The seven step process below is the framework GAF Master Elite contractors follow on every residential install. Each step builds on the one before it, and skipping any single phase compromises the entire system.
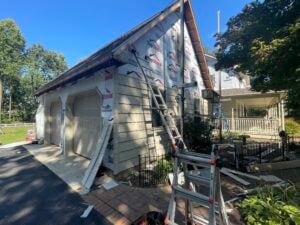
1. Site Preparation and Property Protection
Site preparation is the first step and protects your landscaping, siding, vehicles, and HVAC equipment from falling debris during the tear off. A professional crew arrives with tarps, plywood sheets, magnetic nail sweepers, and dump trailers staged in the driveway before a single shingle is touched. This phase typically takes 1 to 2 hours and is often where the difference between a careful contractor and a sloppy one becomes obvious. Plants get covered, AC condensers wrapped, and gutters protected from impact.
- Tarp coverage: Heavy duty tarps shield gardens, decks, and patios from falling shingles and nails.
- HVAC protection: AC condensers and heat pumps are wrapped to prevent debris damage.
- Driveway staging: Dump trailers are positioned to minimize foot traffic across the lawn.
2. Tear Off of the Existing Roof
Tear off involves stripping the old roof down to the bare wood decking, removing all shingles, underlayment, drip edge, and damaged flashing. A typical 2,000 square foot roof generates 4 to 6 tons of debris and takes a 4 person crew about 4 to 6 hours to remove. Tearing off is preferred over an overlay because it allows the deck to be inspected for rot, soft spots, and old fastener holes that need patching. Most manufacturer warranties also require a full tear off rather than installation over existing shingles.
- Full removal: Shingles, underlayment, and old flashing all come off down to bare decking.
- Debris management: A dump trailer or roll off catches material as it slides off the roof.
- Deck inspection: Crews mark soft spots and rotted sections as they go.
3. Roof Deck Inspection and Repair
Deck inspection happens immediately after tear off and identifies any plywood or OSB compromised by past leaks, animal intrusion, or age. Replacing damaged sheathing typically adds $70 to $120 per 4×8 sheet to the total cost, and a thorough crew will not skip this step. According to a study by the National Association of Home Builders, asphalt shingle roofs are designed to last about 20 years, but that lifespan assumes installation over a sound, dry deck. Installing new shingles over rotted plywood guarantees premature failure regardless of shingle quality.
- Sheathing replacement: Damaged plywood or OSB is cut out and swapped before underlayment goes down.
- Nail re fastening: Loose decking is renailed to the rafters with ring shank nails for better holding power.
- Moisture check: Crews verify the deck is fully dry before any underlayment or shingles are applied.
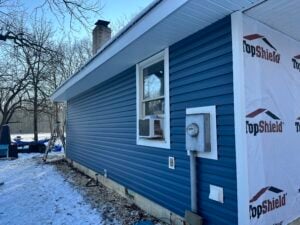
4. Underlayment and Ice and Water Shield Installation
Underlayment installation creates the secondary moisture barrier between the deck and the shingles, and is the layer that saves your home if a shingle ever lifts during a storm. Self adhered ice and water shield is installed first along eaves, valleys, and around penetrations, typically extending 24 to 36 inches up from the wall line. Synthetic underlayment then covers the rest of the deck, overlapping each row by at least 4 inches. This phase usually takes 3 to 5 hours on an average home.
- Ice and water shield: Self sealing membrane covers eaves, valleys, and penetrations to block ice dam leaks.
- Synthetic underlayment: Modern polymer based underlayment replaces older felt for better tear resistance.
- Cap nail fastening: Plastic cap nails prevent the underlayment from tearing around fastener heads.
5. Drip Edge, Flashing, and Starter Course Installation
Drip edge and flashing installation defines how water exits the roof system and is the most leak prone area when done incorrectly. Aluminum or galvanized drip edge is installed along eaves before the underlayment and along rakes after, with overlapping seams pointed downslope. Step flashing is woven into shingle courses where the roof meets walls, chimneys, and skylights. The starter course of shingles, which has factory applied adhesive, runs along the eaves and rakes to lock the first row in place against wind uplift.
- Drip edge placement: Installed under underlayment at eaves and over underlayment at rakes for proper water shedding.
- Step flashing: Interleaved with shingles at wall intersections to prevent sidewall leaks.
- Starter shingles: Factory adhesive strip locks down the first course against high wind events.
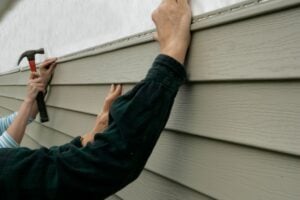
6. Shingle Installation
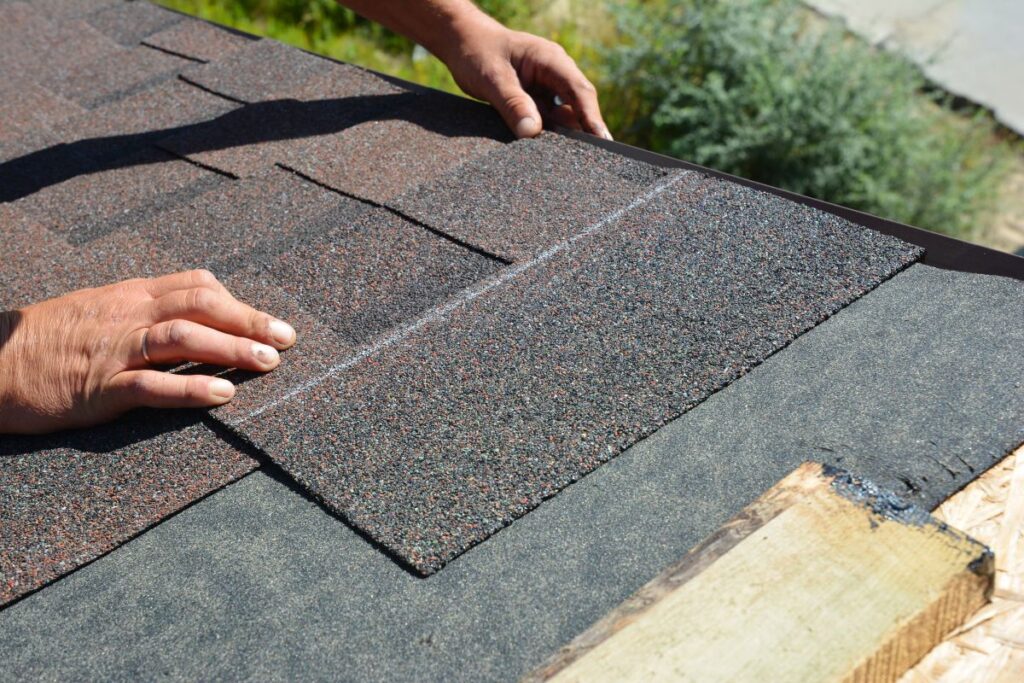
Shingle installation is the most visible phase and follows a precise pattern of staggered courses fastened with 4 to 6 nails per shingle depending on wind zone requirements. Architectural shingles are installed from the eaves upward, with each course offset by half a tab from the row below to prevent water tracking. Nails must hit the manufacturer designated nail line, neither too high nor too low, and must drive flush without breaking the surface. A 2,000 square foot roof typically takes 1 to 2 days to shingle depending on complexity, pitch, and the number of valleys and dormers.
- Nailing pattern: 4 nails per shingle in standard zones and 6 in high wind coastal areas like Sussex County.
- Course staggering: Each row offset by half a tab to prevent water from tracking between joints.
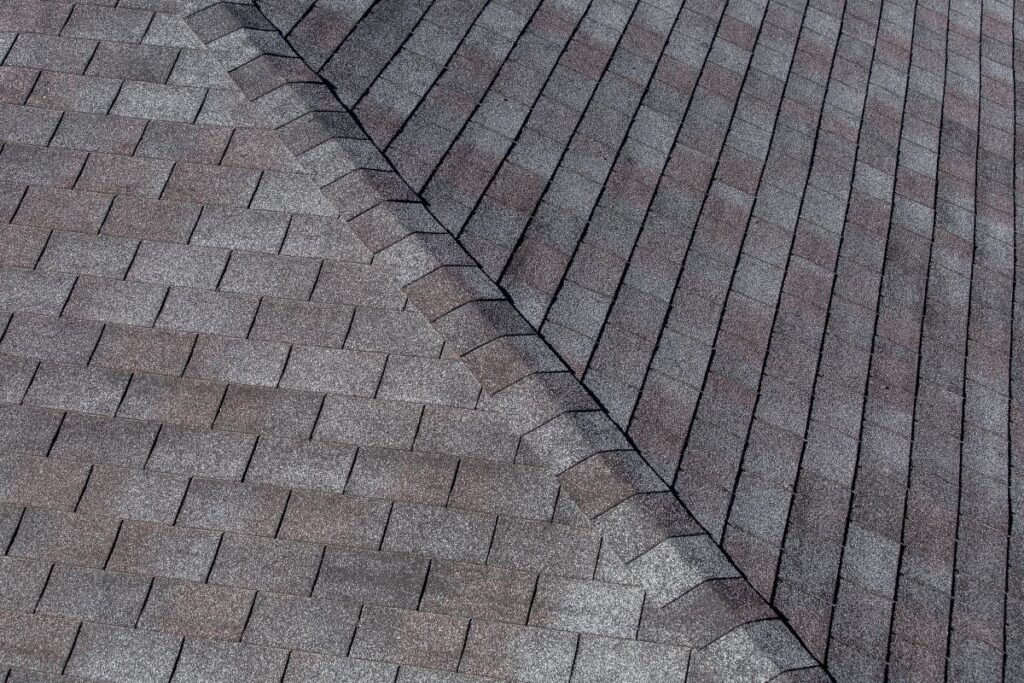
- Valley treatment: Shingles either woven or cut and lapped over a metal valley liner for clean water shedding.
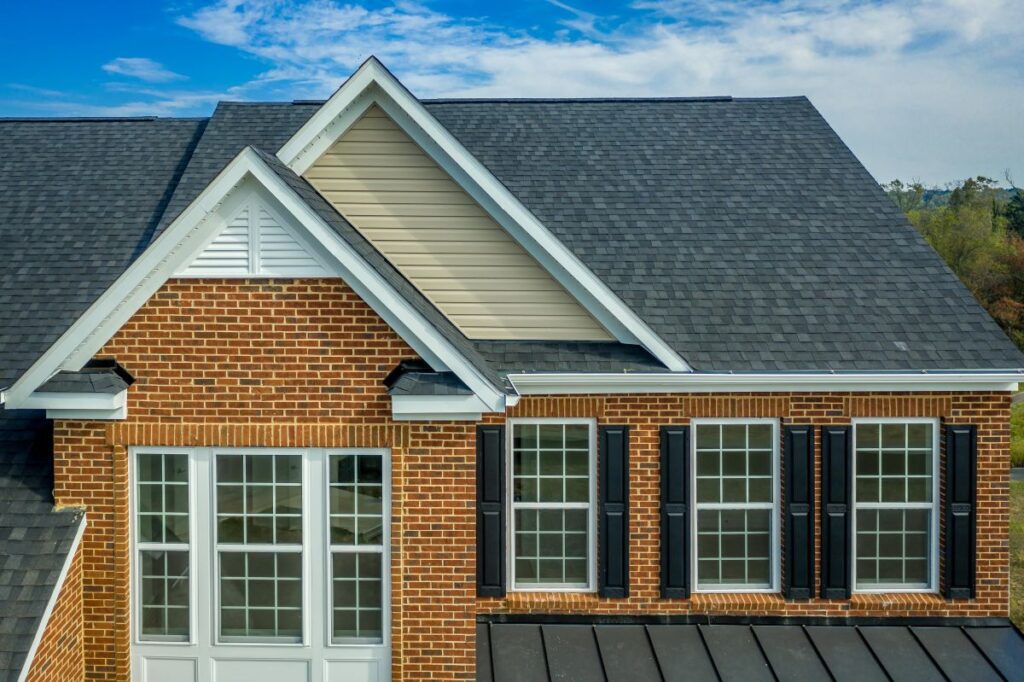
7. Ridge Cap, Ventilation, and Final Cleanup
The final step caps off the roof with ridge vent and ridge cap shingles while crews complete a thorough cleanup of the property. Ridge vent installation requires cutting a 1 to 2 inch slot along the peak to allow hot attic air to escape, paired with intake vents at the soffits to create balanced airflow. Proper attic ventilation can extend shingle lifespan by up to 25% by reducing heat buildup. Final cleanup includes magnetic nail sweeps across the entire property, gutter clearing, and a walk through with the homeowner before payment.
- Ridge vent: Continuous slot vent pulls hot air out of the attic and reduces shingle baking.
- Soffit intake: Balanced airflow requires equal intake at soffits and exhaust at the ridge.
- Magnetic sweep: Crews sweep the lawn, driveway, and surrounding landscape to capture stray nails.
- Final walkthrough: The homeowner inspects the work and receives warranty paperwork before sign off.
What Safety Measures Are Required During Roof Installation?
Roof installation is one of the most dangerous trades in residential construction, and proper safety protocols protect both the crew and your property. Reputable contractors follow OSHA fall protection standards on every job, which is one of the clearest signs of a professional operation versus a corner cutting one.
Why Is Fall Protection So Critical?
Falls from elevation are the leading cause of fatal injuries in roofing, accounting for roughly one third of all construction deaths each year according to OSHA data. Federal regulations require fall protection on any roof work performed at heights of 6 feet or greater, which covers virtually every residential install. Compliant crews use personal fall arrest systems with full body harnesses, anchor points, and shock absorbing lanyards on steeper pitches, while toe boards and guardrails serve as secondary protection on lower slopes. Cutting safety corners is also a financial red flag for homeowners, since uninsured injuries on your property can become your liability if the contractor lacks proper workers compensation coverage.
- Harness systems: Full body harnesses with shock absorbing lanyards are required above 6 feet.
- Anchor points: Roof anchors are temporarily installed at the ridge to support harness lines.
- Toe boards: Wooden boards along the eaves catch slipping crew members and falling tools.
- Workers comp verification: Confirms that injuries on your property are covered by the contractor.
How Are Property and Bystanders Protected?
Property and bystander protection extends safety beyond the crew to anyone living in or visiting the home during the install. A professional contractor establishes a controlled work zone with cones and caution tape, restricts pedestrian access near drop zones, and times noisy phases like tear off to avoid early morning or late evening hours. Pets are kept indoors during work hours, children are kept clear of debris fields, and homeowners receive clear communication on which entrances remain safe to use. Magnetic nail sweeps performed twice daily, once at lunch and once at the end of the day, prevent flat tires and pet injuries from stray fasteners.
- Drop zone marking: Cones and caution tape define no go areas around the perimeter of the home.
- Daily nail sweeps: Magnetic rollers pick up stray fasteners from the lawn and driveway.
- Pet and child safety: Crews coordinate access points so the family can move safely during work hours.
- Communication plan: Daily check ins keep the homeowner informed on schedule and access changes.
How Long Does an Asphalt Shingle Roof Installation Take?
A typical asphalt shingle roof installation takes 1 to 3 days from tear off to final cleanup on an average sized home. Larger homes, complex roof lines, and weather delays can push that timeline to 4 or 5 days.
What Factors Extend the Timeline?
Several variables influence how long an install takes, and understanding them helps homeowners in Rehoboth Beach and surrounding areas plan around the disruption. Roof complexity is the biggest factor, since cut up roofs with multiple valleys and dormers take twice as long as simple gable designs of the same square footage. Weather is the second factor, since rain forces crews to tarp the deck and wait for dry conditions before laying shingles.
- Roof complexity: Hips, valleys, and dormers can double labor time compared to simple gable roofs.
- Weather windows: Rain in the forecast forces crews to pause and tarp the deck overnight.
- Hidden damage: Rotted decking discovered during tear off adds material and labor time to the schedule.
Frequently Asked Questions
How Much Does Asphalt Shingle Roof Installation Cost in Delaware?
Asphalt shingle roof installation in Delaware typically costs $7,000 to $15,000 for an average sized home, or roughly $4 to $7 per square foot installed. Architectural shingles cost more than 3 tab options but offer better wind resistance and a longer service life. Final pricing depends on roof size, pitch, complexity, and whether decking repairs are needed.
Can I Install Asphalt Shingles Myself?
DIY asphalt shingle installation is technically possible but rarely advisable for full roof replacements. Manufacturer warranties on premium shingle lines often require certified installation, and a single nailing or flashing error can void coverage. Most homeowner insurance policies also exclude DIY roofing work from claim coverage if storm damage occurs.
How Often Should an Asphalt Shingle Roof Be Replaced?
Most asphalt shingle roofs need replacement every 20 to 30 years depending on shingle grade, ventilation, and climate exposure. Signs that replacement is overdue include curling shingles, granule loss in gutters, missing tabs after storms, and visible sagging.
Is a Tear Off Always Required?
Most reputable contractors and shingle manufacturers require a full tear off rather than an overlay, especially when the existing roof already has two layers. Overlays trap heat, hide deck damage, and shorten the life of the new shingles by 5 to 10 years. Delaware building codes also limit roofs to a maximum of two layers in most jurisdictions.
Are Roofing Contractors in Delaware Required to Be Licensed?
Roofing contractors in Delaware are required to register with the Division of Revenue and carry both general liability insurance and workers compensation coverage. Homeowners should request proof of insurance before signing a contract and verify GAF Master Elite or similar manufacturer certifications.
Will Insurance Cover a New Roof?
Homeowner insurance typically covers roof replacement when damage results from a covered peril like wind, hail, or fallen trees, but does not cover age related wear. Working with a contractor experienced in insurance claims assistance streamlines the process significantly.
Why Grand Exteriors Is the Right Choice for Your Asphalt Shingle Roof Installation
Grand Exteriors brings the gold standard to every asphalt shingle roof installation across Rehoboth Beach and surrounding areas, combining GAF Master Elite certification with the kind of attention to detail that separates a 30 year roof from a 15 year disappointment. As a family owned and operated company, we treat every home like it belongs to a neighbor, which means every one of the seven steps above gets executed without shortcuts.
From emergency repairs and full insurance claims assistance to flexible financing and ongoing maintenance program coverage, we make sure homeowners get more than just a new roof. If your roof is showing its age or you have storm damage that needs immediate attention, contact Grand Exteriors today for a free estimate on your asphalt shingle roof installation and find out why so many Delaware homeowners trust the gold standard.