
How To Clean Vinyl Siding Like a Pro in 5 Steps
Knowing how to clean vinyl siding properly protects the color, curb appeal, and lifespan of one of the most visible parts of your home’s exterior. Coastal Delaware homes face pollen, salt air, mildew, and industrial dust year round, all of which build up on siding and produce the streaked, dingy look that drags down curb appeal. This guide walks homeowners in Bethany and surrounding areas through the exact five step process professional exterior cleaners use to restore vinyl siding to like new condition, along with the tools, solutions, and precautions that separate a good result from a damaged siding job.
- Complete 5 step process: The exact professional workflow for cleaning vinyl siding from prep to final rinse.
- Cleaning solution recipes: Which mixtures work for routine cleaning, mold, mildew, and stubborn stains.
- What to avoid: The common mistakes that cause streaking, damage, or voided manufacturer warranties.
Why Should You Clean Vinyl Siding Regularly?
Cleaning vinyl siding at least once a year protects the color, prevents mold and mildew growth, and extends the useful life of the material by 5 to 10 years. Delaware’s humid summers and coastal salt air accelerate the buildup of algae, mildew, and grime that dulls siding faster than in drier climates.
What Happens If You Skip Regular Cleaning?
Skipping regular vinyl siding cleaning allows dirt, pollen, algae, and mildew to bond permanently with the surface texture, which eventually requires aggressive scrubbing or chemical treatments that can damage the finish. According to the Polymeric Exterior Products Association (formerly the Vinyl Siding Institute), vinyl siding only requires periodic cleaning with mild soap and water from a garden hose to maintain its appearance and performance. Homes left uncleaned for 5 or more years often show dark streaks under eaves, green algae on shaded sides, and a general dinginess that no amount of light cleaning can reverse. Beyond aesthetics, mold and mildew accumulation can also spread to adjacent trim, soffits, and window frames, compounding the maintenance headache.
- Color preservation: Regular cleaning prevents permanent staining and fading.
- Mold prevention: Removing spores before they take hold stops future infestations.
- Lifespan extension: Well maintained siding can last 5 to 10 years longer.
- Curb appeal: Clean siding photographs and shows dramatically better than dirty siding.
5 Step Process to Clean Vinyl Siding Like a Pro
The five step process below is the professional workflow used by exterior cleaning contractors and manufacturer approved for use with all major vinyl siding brands. Follow the steps in order for the best results and the least risk of damage.
1. Gather the Right Tools and Cleaning Solution
Gathering the right tools and cleaning solution is the foundational first step that determines whether the rest of the job goes smoothly or produces streaks and damage. Professional vinyl siding cleaning requires a soft bristle brush with a long telescoping handle, a garden hose with an adjustable spray nozzle, a five gallon bucket for cleaning solution, drop cloths for protecting plants, and safety gear including gloves and eye protection. The cleaning solution itself depends on what you are removing. For routine dirt and pollen, a mixture of one gallon of warm water with a few tablespoons of dish soap works well. For mildew and mold, the PEPA recommended solution is 30% white vinegar mixed with 70% water, which handles most organic growth without damaging landscaping or siding.
- Soft bristle brush: A long handled brush with soft bristles prevents scratching the vinyl surface.
- Garden hose with nozzle: An adjustable spray nozzle allows switching between rinse and stream patterns.
- Routine cleaning mix: A few tablespoons of dish soap in a gallon of warm water for light dirt.
- Mold and mildew mix: 30% white vinegar and 70% water for organic growth, per PEPA guidelines.
2. Prepare the Work Area and Protect Landscaping
Preparing the work area and protecting landscaping prevents the most common accidental damage during vinyl siding cleaning. Cover any shrubs, flower beds, and delicate plants near the house with plastic drop cloths or old bed sheets before applying any cleaning solution, since even mild soap and vinegar mixtures can stress sensitive plants. Move patio furniture, grills, and outdoor decor at least 6 feet away from the walls being cleaned. Close all windows and doors tightly to prevent water intrusion, and disconnect or cover exterior electrical outlets to reduce shock risk. Sweep away debris like leaves, spider webs, and loose dirt from the siding surface with a broom or leaf blower before wetting anything, since this simple prep step prevents mud from smearing during the wash.
- Plant protection: Cover shrubs and flower beds with plastic or old sheets.
- Furniture removal: Move outdoor items at least 6 feet from work areas.
- Window sealing: Close and lock all windows and doors before spraying water.
- Debris sweep: Remove leaves and webs with a broom before wetting the siding.
3. Wash from the Bottom Up
Washing from the bottom up is the counterintuitive but essential technique that prevents streaking during vinyl siding cleaning. Starting at the top of the wall allows dirty water and cleaning solution to run down over dry, dirty siding below, creating streaks and stains that dry into the surface. Instead, wet the bottom section of siding with plain water first, apply cleaning solution with the soft bristle brush using gentle side to side motion, and rinse thoroughly before moving up to the next section. Work in sections roughly 4 to 5 feet wide, keeping the surface below wet at all times so cleaning solution and dirty water flow down over already clean, wet surfaces rather than dry ones. Rinse each section completely before the cleaning solution dries.
- Bottom up direction: Prevents streaking that top down cleaning always causes.
- Section by section: Work in 4 to 5 foot wide sections for manageable coverage.
- Keep surfaces wet: Solution runs cleanly over wet surfaces without staining.
- Gentle motion: Side to side scrubbing prevents pushing dirt into siding grooves.

4. Rinse Thoroughly from Top Down
Rinsing thoroughly from top down is the reverse of the washing direction and removes all remaining cleaning solution before it can dry into the surface. Start at the highest section you have cleaned and work your way down with clear water from the garden hose, using enough pressure to flush the solution but not so much that water forces its way behind the siding panels. Pay special attention to the underside of overlapping courses where cleaning solution can collect and hide, and to textured surfaces where solution can hide in the grooves. Complete the rinse within 10 minutes of washing each section to prevent cleaning solution from drying on the surface, which can leave a milky residue that requires re cleaning to remove.
- Top down direction: Reverses the washing direction to flush solution downward.
- Overlap attention: Rinse under lap joints where solution collects.
- Textured surface care: Extra rinse time for grooves and dimensional textures.
- 10 minute window: Rinse before cleaning solution dries on the siding.
5. Inspect and Address Stubborn Stains
Inspecting and addressing stubborn stains after the initial wash is the final professional step that separates a good cleaning from an excellent one. Walk the perimeter of the home and look for any remaining stains, dark spots, or areas where the initial cleaning did not fully remove buildup. Common problem spots include tar drips near driveways, rust streaks under metal fixtures, and mildew stains in perpetually shaded areas under eaves and behind foundation plantings. Apply spot cleaners like Fantastik or Murphy Oil Soap directly to these areas with a soft cloth, work them in gently, and rinse immediately. For heavier mildew, a slightly stronger vinegar solution (up to 50% vinegar to 50% water) can be applied to just the affected spots without harming the surrounding siding.
- Tar and grease: Apply Murphy Oil Soap or Fantastik to isolated spots.
- Rust streaks: Use commercial rust remover formulated for vinyl surfaces.
- Heavy mildew: Apply 50% vinegar mixture only to problem spots.
- Immediate rinse: Follow every spot treatment with a thorough water rinse.
Should You Use a Pressure Washer on Vinyl Siding?
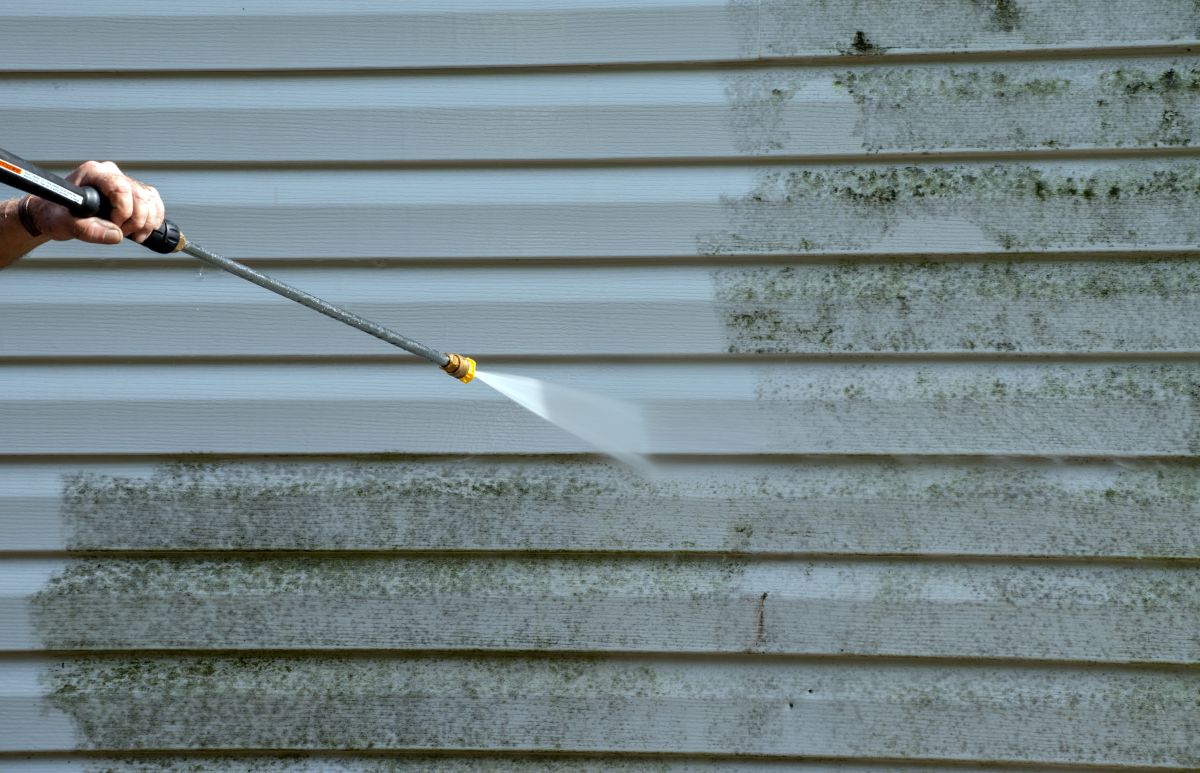
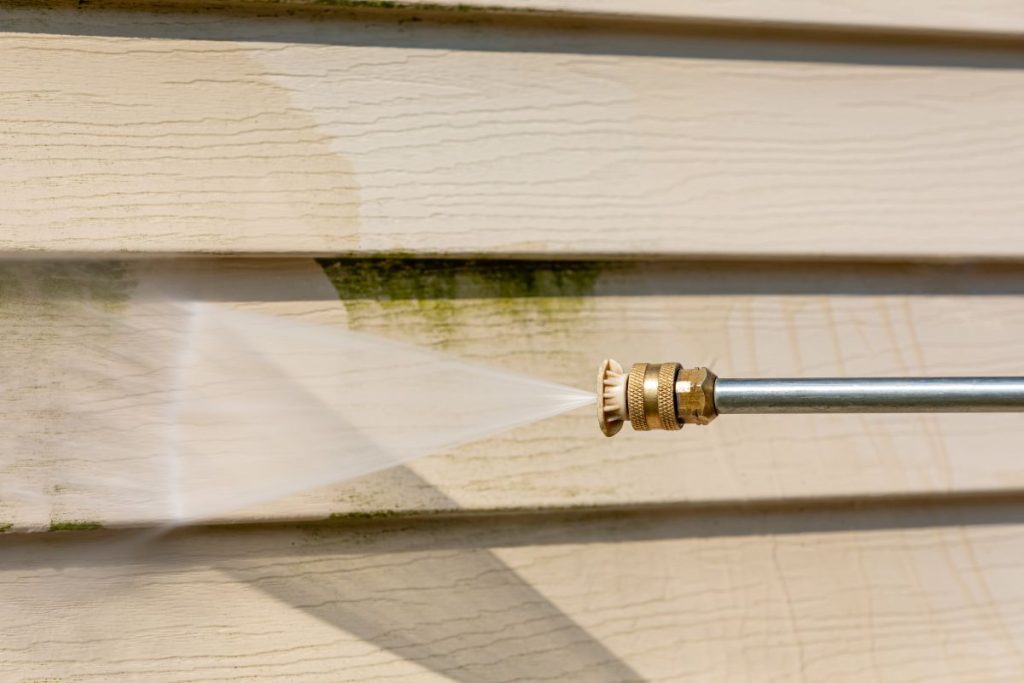
Pressure washing vinyl siding is possible but requires more caution than most homeowners realize. Some manufacturers explicitly forbid pressure washing, others allow it with strict pressure limits, and improper use can force water behind the panels and cause serious moisture damage inside the wall.
What Are the Pressure Washing Rules?
Several strict rules apply when pressure washing vinyl siding to avoid damage to the panels or the home behind them. Keep the pressure setting low, typically 1,300 to 1,600 PSI at most, and use a wide 25 to 40 degree spray tip that disperses the water over a larger area. Hold the nozzle at eye level or angled slightly downward, never upward, since upward spray forces water behind lap joints where it can soak insulation and wall sheathing. Stay at least 3 to 4 feet away from the surface, and never spray directly at windows, doors, electrical fixtures, or dryer vents. CertainTeed and several other major manufacturers do not recommend pressure washing at all, so check with your specific siding manufacturer before using any pressurized equipment on their product.
- PSI limit: Keep pressure at 1,300 to 1,600 PSI or lower.
- Spray angle: Always aim level or downward, never upward.
- Distance: Maintain at least 3 to 4 feet from the surface.
- Manufacturer check: Verify pressure washing is approved for your specific siding brand.
Frequently Asked Questions
How Often Should Vinyl Siding Be Cleaned?
Vinyl siding should be cleaned at least once a year to remove dirt, pollen, and mildew before they bond with the surface. Homes in coastal Delaware with heavy salt air or dense tree coverage may benefit from twice yearly cleaning in spring and fall.
Can I Use Bleach to Clean Vinyl Siding?
Undiluted chlorine bleach can damage vinyl siding and harm landscaping, so it should not be used at full strength. A heavily diluted mixture of one part bleach to four parts water can treat severe mold, but the PEPA recommended 30% vinegar solution is safer for both the siding and surrounding plants.
What Is the Best Time of Year to Clean Vinyl Siding?
Spring and fall are the best times to clean vinyl siding, when temperatures are mild and cleaning solutions do not dry too quickly on the surface. Avoid cleaning in direct summer sunlight or when temperatures exceed 90 degrees, since heat causes solutions to dry before they can be rinsed away.
Do I Need to Hire a Professional for Vinyl Siding Cleaning?
Most homeowners can clean vinyl siding themselves using the 5 step process outlined above, but multi story homes, extensive mildew problems, or delicate landscaping situations often benefit from professional cleaning. Professionals typically charge $200 to $600 depending on home size and complexity.
How Do I Remove Green Algae from Vinyl Siding?
Green algae responds well to the 30% vinegar and 70% water mixture applied with a soft bristle brush and left to sit for 5 to 10 minutes before scrubbing gently. For heavy algae buildup, a commercial oxygen bleach solution (one cup per gallon of water) is an effective alternative that does not harm landscaping.
Will Cleaning My Vinyl Siding Damage It?
Cleaning vinyl siding correctly using soft bristle brushes and mild solutions will not damage the surface. Damage typically occurs from abrasive scrub pads, undiluted bleach or solvents, high pressure washing at close range, or letting cleaning solutions dry on the surface before rinsing.

Why Grand Exteriors Is the Right Choice for Your Vinyl Siding Needs
Grand Exteriors brings the gold standard to every vinyl siding installation, cleaning consultation, and repair across Bethany and surrounding areas, combining GAF Master Elite roofing expertise with the exterior craftsmanship that keeps Delaware homes looking their best year after year. As a family owned and operated company, we help homeowners understand exactly how to clean vinyl siding safely, identify when professional cleaning is worth the investment, and spot the damage patterns that indicate deeper issues like moisture intrusion or fading beyond repair. From emergency repairs and full insurance claims assistance to flexible financing and ongoing maintenance program coverage, we support homeowners through every phase of exterior ownership. If your vinyl siding is showing signs of damage, fading, or age that cleaning alone cannot fix, contact Grand Exteriors today for a free estimate and an honest assessment of whether repair, refinishing, or replacement is the right next step.

Recent Articles